
Dealing with noise is one of the biggest challenges when monitoring JavaScript errors on a busy site. Old browsers, misbehaving extensions, and ad blockers can all cause erroneous or irrelevant errors. Sometimes lots of them. Giving our customers better tools to filter and sort through the sea of errors is a priority for us. The easier it is to find important problems the faster it is to fix them.
To that end, we’ve recently released a new suite of global filtering capabilities in TrackJS!
Global Filter Bar
TrackJS has always had a number of filtering options, but now we’ve merged them all in a single toolbar that can be accessed from every page.
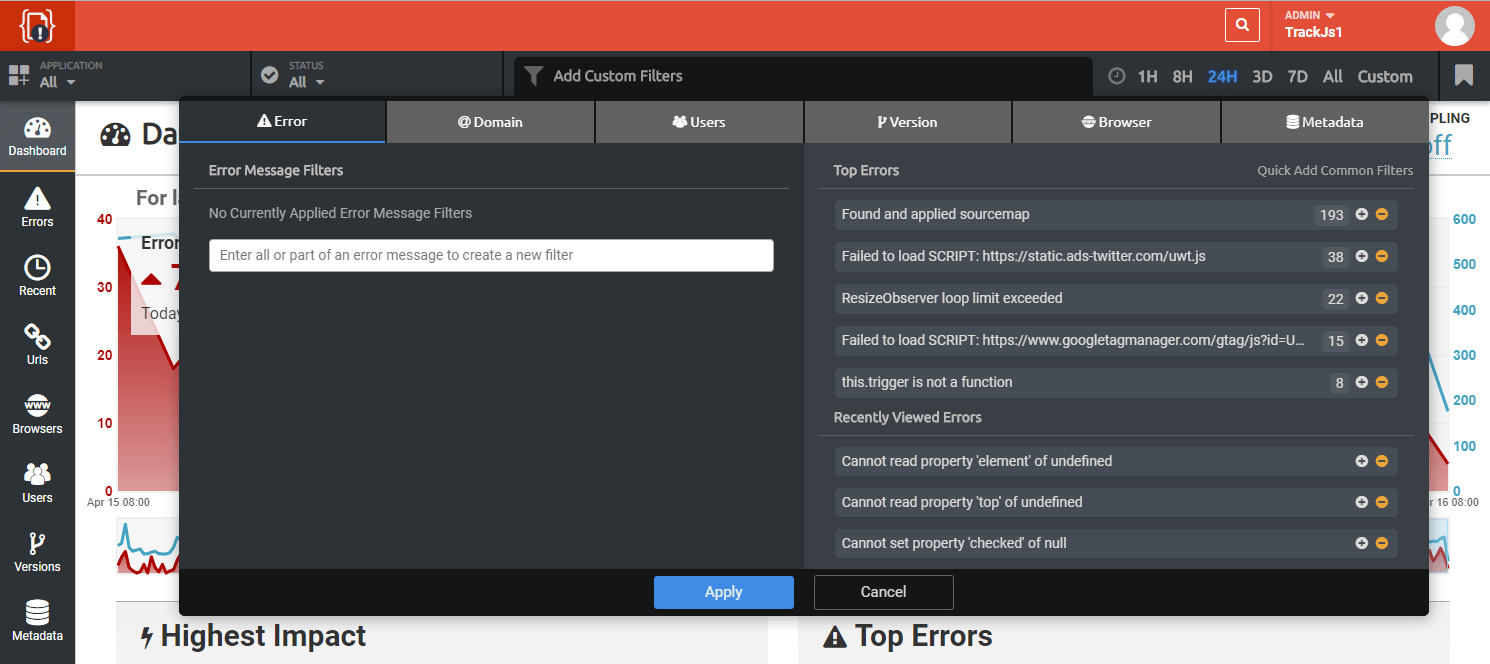
You can switch applications, apply different status values, or add your own custom filters all in one spot. You can also adjust the time range you’re filtering by, and even save your filters for quick recall later or sharing amongst your team.
Multiple Filters
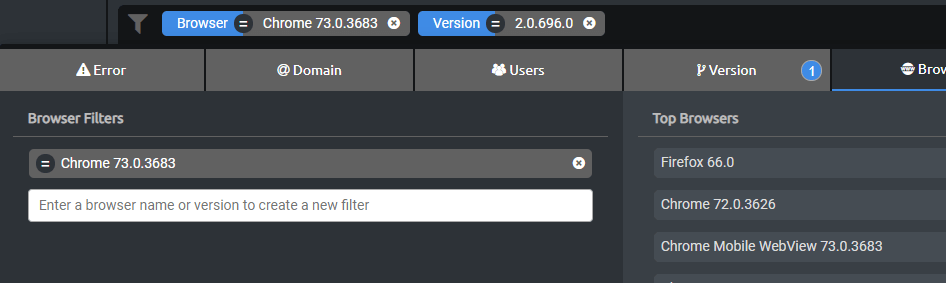
It’s now possible to filter your errors by multiple properties. Previously you could add one custom filter, but now you can have as many as you want. You can combine error message filters with domain based filters, or user and version, or any other combination.
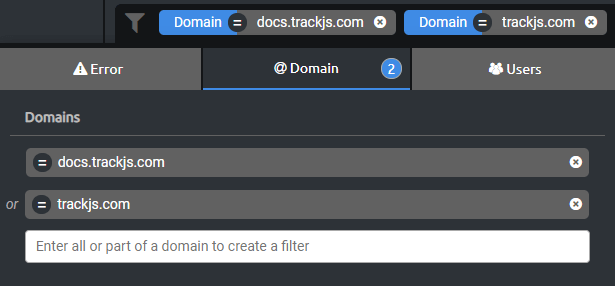
It’s also possible to apply multiple filters for the same property. For example, if I cared only about errors from two of our domains, I could create a filter to see all the errors that came from either trackjs.com or docs.trackjs.com.
Quick Suggestions
To make it easier to find important data, we’re displaying the top 5 values for each tab and letting you quickly apply those values as filters.
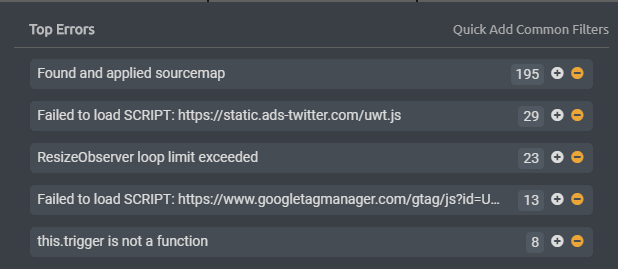
As you start adding more filters, we will adjust the top values on each tab to take in to account the filters you’ve already applied, so you can quickly drill down and discover errors on your site.
New Filter Types
We’ve also enhanced the kinds of filtering you can do. You can, of course, apply filters that match exact error values, but you can also apply search-based filters. We’ve even added the ability to “invert” filters, so you can exclude errors that match certain criteria.
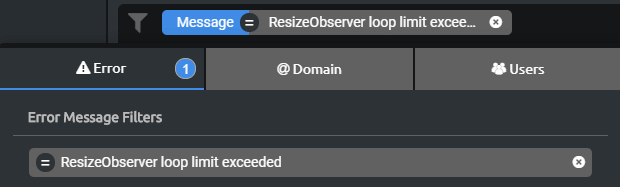
Exact Match
By default, when you add a new filter from somewhere in the UI, it’s an exact match filter. That is, it will filter all your errors down to the set that matches that property value exactly. Exact match filters are denoted by an equals icon.
Search Filters
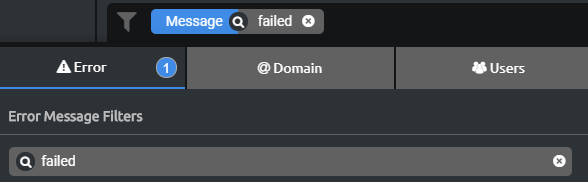
If you want a broader set of matching errors, you can create a search filter. By typing in to the filter box on any of the tabs, you will be presented with the search option in the autocomplete box. If you select this, you will create a search filter, which will include (or exclude) all errors in the search result set.
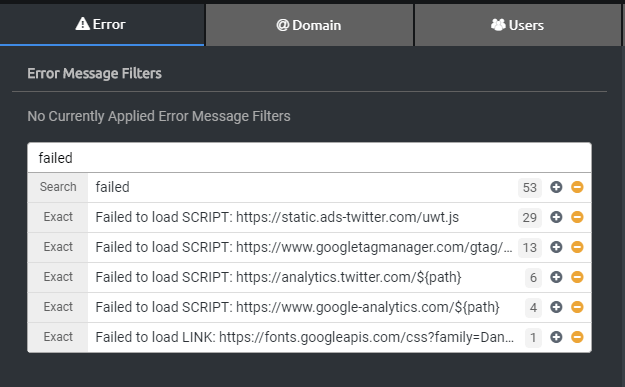
Search filters are really powerful as they allow you to add all kinds of wildcard and pattern based filters without having to learn nasty syntax or a proprietary query language.
NOT Filters
Many times JavaScript error noise is caused by one or two offenders. Maybe a single user experienced an infinite error loop, or someone using an unsupported browser was causing dozens of new errors. In that case it’s easier to exclude those errors rather than include everything else.
To exclude a certain error value, simply click the orange “minus” icon wherever you see it.


NOT filters are denoted with a “not equals” icon.
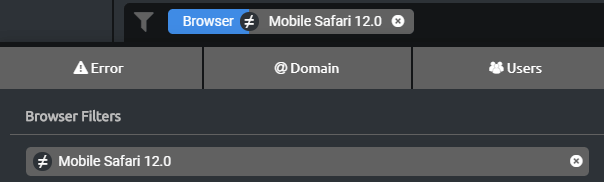
Once applied, any errors matching the filter value will be hidden from the UI, making it easier to exclude noisy users and browsers.
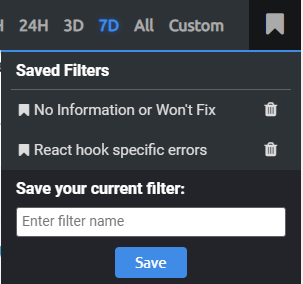
Saving Filters
If you’ve set up a series of filters that you’d like to save, or share with someone else on your team, you can click the “save filter” icon in the right side of the filter bar. Enter a name for your saved filter and click “Save.” Alternatively, you can load a previously saved filter just by clicking on the name in the dropdown.
Adding Filters from Other Places
To make adding filters even more efficient, you can also create them from the error list pages. For example, here we see a list of recent errors, and the options we have to filter them further. You can create exact match and NOT filters.
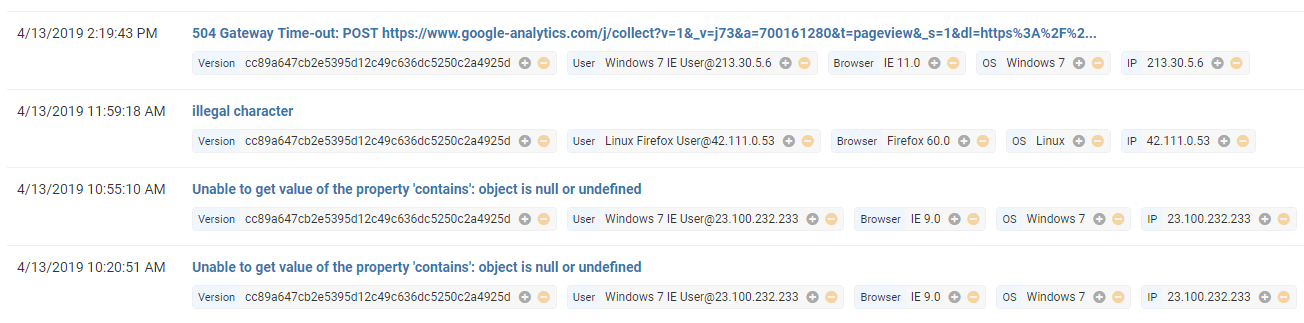
There are a few additional properties that you can filter by that are not present in the filter bar dropdown, and can only be accessed from these screens: Operating System, IP address, and whether an error has a stack trace.

Taming the Noise
We think the new filtering capabilities give our customers better tools to hone in on actual issues occurring in production. The filters can tame the noise and surface more actionable data. We’re always soliciting feedback from our customers, so if you like, or hate, something about the new filtering capabilities, please let us know! We’ll be monitoring usage and seeing which pieces get used the most, and making any adjustments as necessary.
